|
First time trying one of my Tutorials? Then please check my Terms of Use before you continue
You will need: Font of your choice - I used one called vincentshand-regular Tube and Close Up of your choice - I will be using the artwork of Jamie Kidd License and Tubes available at Creative Design Outlet One of my Templates SpawnsFSTemplate046
Filters: xero/Fritillary Eye Candy 6/Perspective Shadow (optional)
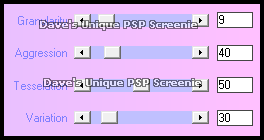
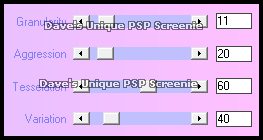
Ok let's begin Open my Template ... Window> Duplicate ... Close Original ... Delete the Credits layer Change the Foreground and Background colors to two colors from your Tube Activate the Top Strip layer ... Selections>Select All ... Selections> Float Selections> Defloat ... Flood Fill the Selection with your Foreground color Selections> Select None ... Effects> xero> Fritillary
Activate the White Mini Squares layer Adjust> Brightness and Contrast> Brightness/Contrast ... Brightness -255 Contrast 0 Change this layers Blend Mode to Overlay and Opacity to around 50 Layers> Merge> Merge Down
Activate the Left Side layer ... Layers> Merge> Merge Down Change the Foreground color to Gradient ... with the following settings Foreground-Background Style - Linear ... Angle 45 ... Repeats 4 Invert unchecked
Selections> Select All ... Selections> Float ... Selections> Defloat Flood Fill the Selections with your Gradient Selections> Select None ... Effects> xero> Fritillary
Activate the Main Background layer ... Effects> xero> Fritillary ... same settings as before Paste your Close Up as a New Layer Move into a suitable position so what you want to see is in view Change this layers Blend Mode to Luminance or Luminance(L) Also change the layers Opacity to around 70 Layers> Duplicate ... Image> Mirror ... Hide this layer for now
Activate the Black Lines layer Change this layers Blend Mode to Soft Light Activate the Top Strip layer ... Paste your Tube as a New Layer Resize if needed and position to the left of your canvas Apply a suitable Drop Shadow ... I used Effects> Eye Candy 6> Perspective Shadow ... Settings ... Drop ... Blurry
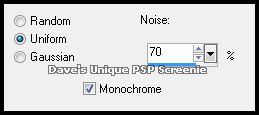
Layers> Duplicate ... Image> Mirror ... Layers> Merge> Merge Down Activate the Border layer ... Selections>Select All ... Selections> Float Selections> Defloat ... Flood Fill the Selection with a color from your Tube Adjust> Add/Remove Noise> Add Noise
Add Copyrights and your Name ... Hide ALL layers apart from Black Lines ... Bottom Close Up ... Main Background
ANIMATING
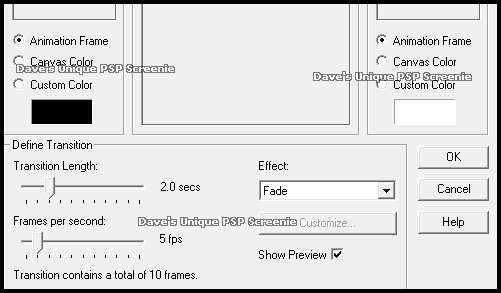
Edit> Copy Special> Copy Merged ... Go back to Animation Shop Edit> Paste> After Current Frame ... Click once on the first frame Effects> Insert Image Transition
Edit> Select All ... Edit> Copy ... Click on frame 12 Edit> Paste> After Current Frame ... Animation> Reverse Frames This is your Animation ... Minimize for the moment
Return to PSP and hide the bottom 4 layers and unhide the rest Edit> Copy Special> Copy Merged ... Go back to Animation Shop Hold down CTRL and keep pressing L until you have 24 frames
Edit> Select All ... Edit> Copy ... Activate your Animation ... Edit> Select All Edit> Paste> Into Selected Frames ... move into position and click once
(Optional) I slowed the Animation down ... with all frames selected ... Animation> Frame Properties ... 20 And that's it. All that's left is to save your Tag ... If you wish to Preview it first View> Animation
Tutorial written 26/12/16 ©David Hanslip |